CloudPanel Server Setup
🆘 This is out of date. Please View the NEW Guide here!
This is an older guide and is not needed in most cases if you still wish to use this guide please feel free to do so but I would recommend you speak to support first.
This guide shows you how to create a Noipfraud server in minutes. It is for users who have no experience with server setup. So its very detailed step by step, and does NOT involved difficult code, SSH or server terminal commands.2
Don’t worry - it may look like a long process - but its super quick! But … if you need help you can 💬 chat with us on telegram or 📧 email us at support@noipfraud.com
TLDR;
In summary, in this guide we will cover the following steps:
- Prepare the necessary resources, including a domain, a host for your server, and a Noipfraud API key & secret.
- Create your server by following the CloudPanel guide for your preferred host, such as Digital Ocean, Vultr, or AWS.
- Configure the server by creating the admin user and setting up your first site.
- Set up your domain by configuring DNS settings, setting up SSL, and testing your server.
- Install the Noipfraud software by downloading it, uploading it to your server, and extracting it in the appropriate folder.
What do you need?
You need:
- a domain
- a host to create your server
- your noipfraud api key & secret
☁️ If you need a host - we recommend Digital Ocean. Use this signup link to get $200 credit.
The guide uses servers that have CloudPanel installed. This will make it easy to create & manage your sites - but is optional. If you have your own servers / preferred host and know how to install php apps, then you don’t need to follow this guide.
Create your server
Follow the CloudPanel guide for your preferred host below.
⚠️ Make sure you are logged into your hosting account before clicking on the relevant guide below. If you follow the guide, and need to login after the “Deploy CloudPanel Instance” step - it may not select the correct server type.
Tips:
- You want to use the Marketplace guide for Vultr/DigitalOcean and AMI guide for AWS
- Make sure you are logged into your hosting account before clicking the “Deploy CloudPanel Instance” Link
- Most hosts default to a more expensive server than you need. So double check. Shared Regular Performance CPU with 2 GB is fine to get started.
- Even if the server shows its finished in your host dashboard, it may take another 5 min for cloudpanel to be installed
- Assign a permanent IP to your server as mentioned in the guides
- Enable server backups if you have this option
If you don’t want to use any of these, here are some more complicated CloudPanel setups for Azure, Google, Oracle, Herzner.
⚠️ Make sure you open the CloudPanel screen below as soon as you can after setup. There are bots on the internet specifically looking for open CloudPanel Setup screens so you want to lock down your server as soon as you can.
Ones your server has been created, open the CloudPanel screen in your browser by appending the port 8443 to your server ip address like this, replacing yourIpAddress with the IP address for your server: https://yourIpAddress:8443****.
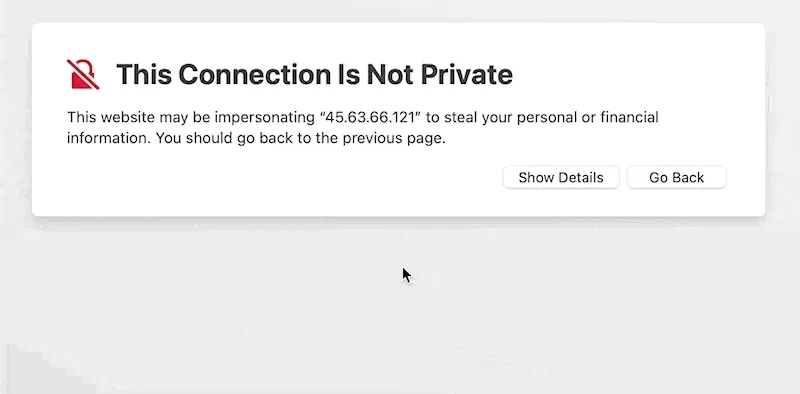
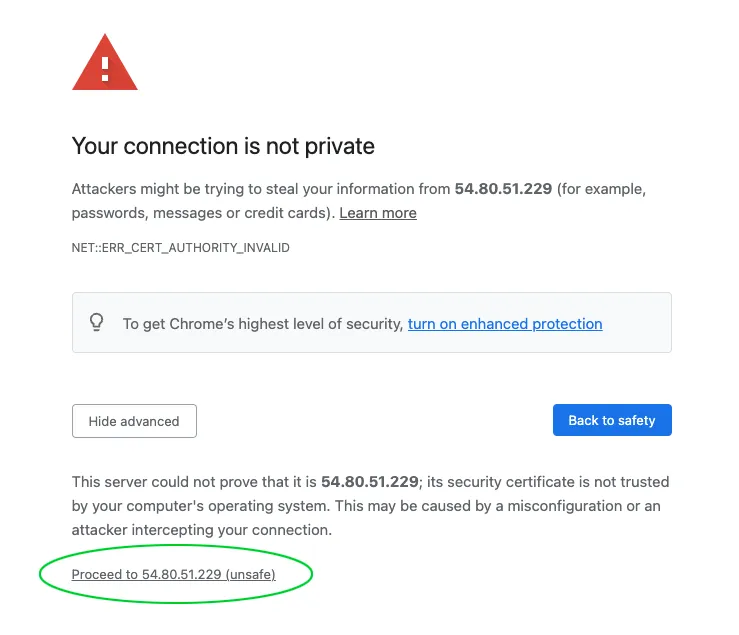
Ignore the self-signed certificate / connection not private error in your browser if it shows up. An example for chrome is shown below. Select the required option (Proceed to ….) to continue opening the site.
IMAGE BELOW!!!
ℹ️ You might want to setup a domain to work with your CloudPanel app, eg: cp.yourdomain.com. Check out this guide on how to do that.
Create the Admin User
When open your server CloudPanel in your browser for the first time - you should see this:
⚠️ Use lower case usernames. CloudPanel will store the username with all Lowercase, but then does not do this when you login. So
Useron login will not be same asuser.
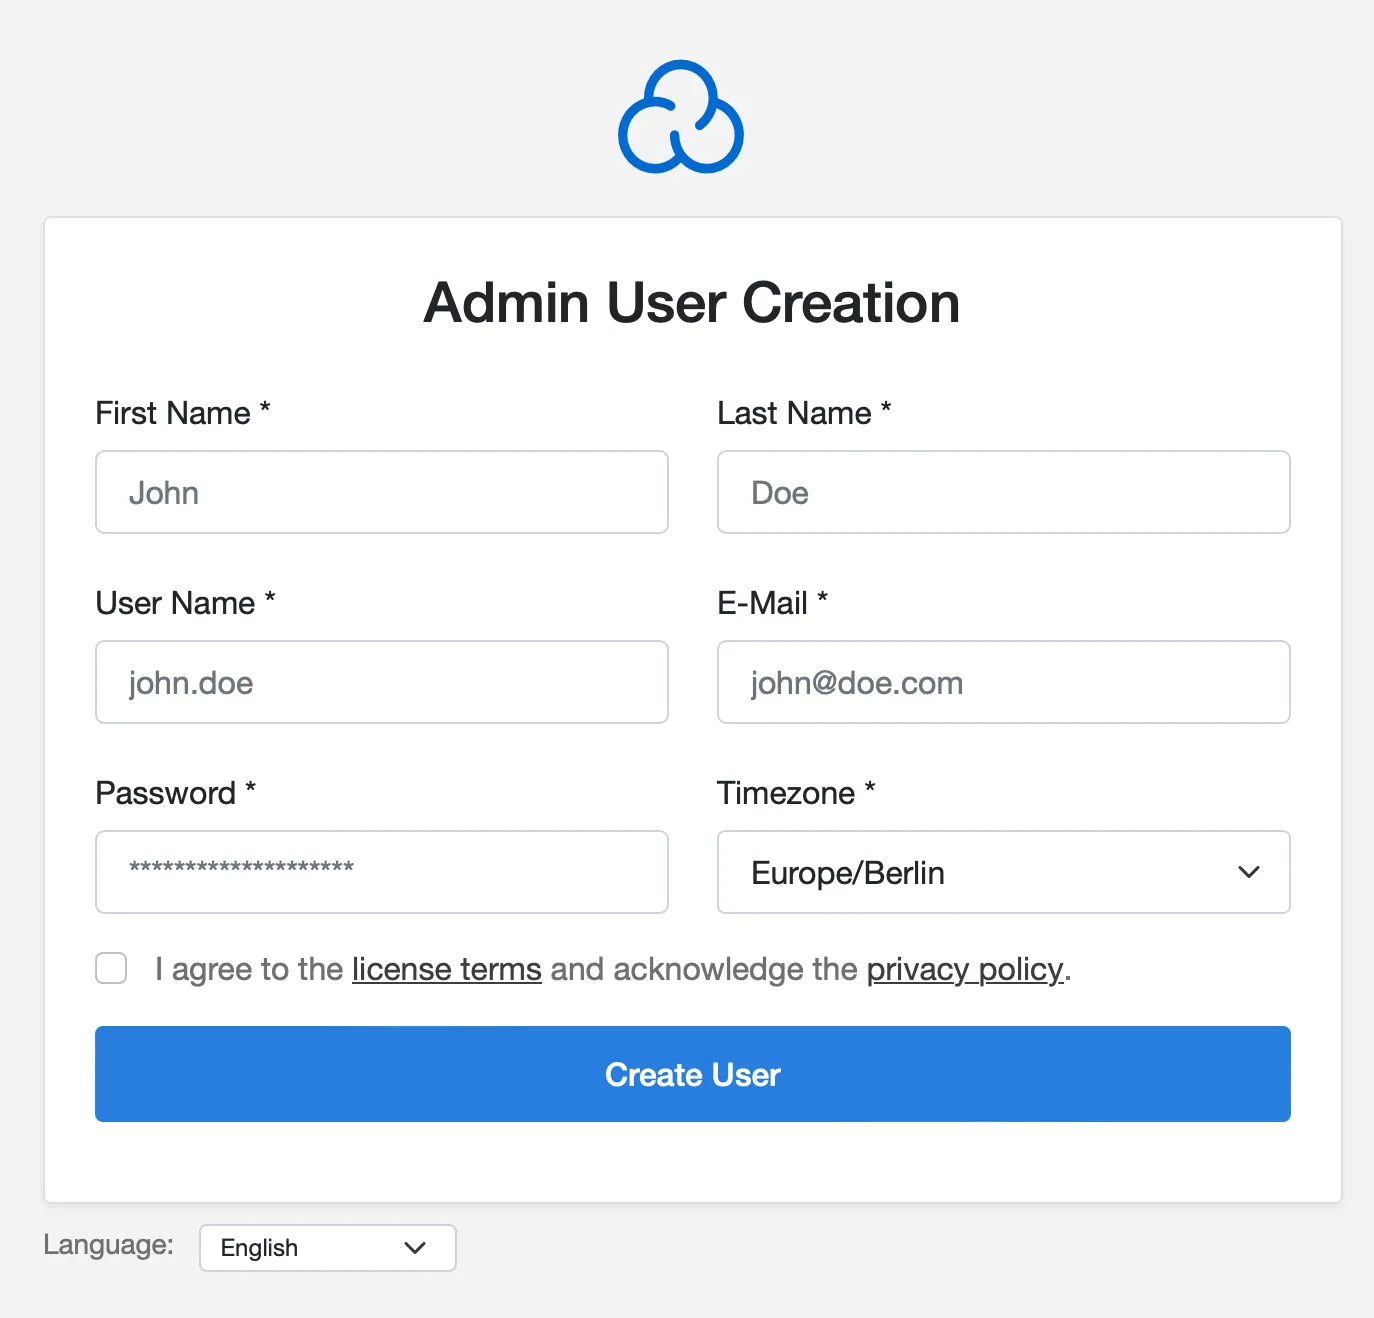
After the admin user is created, login.
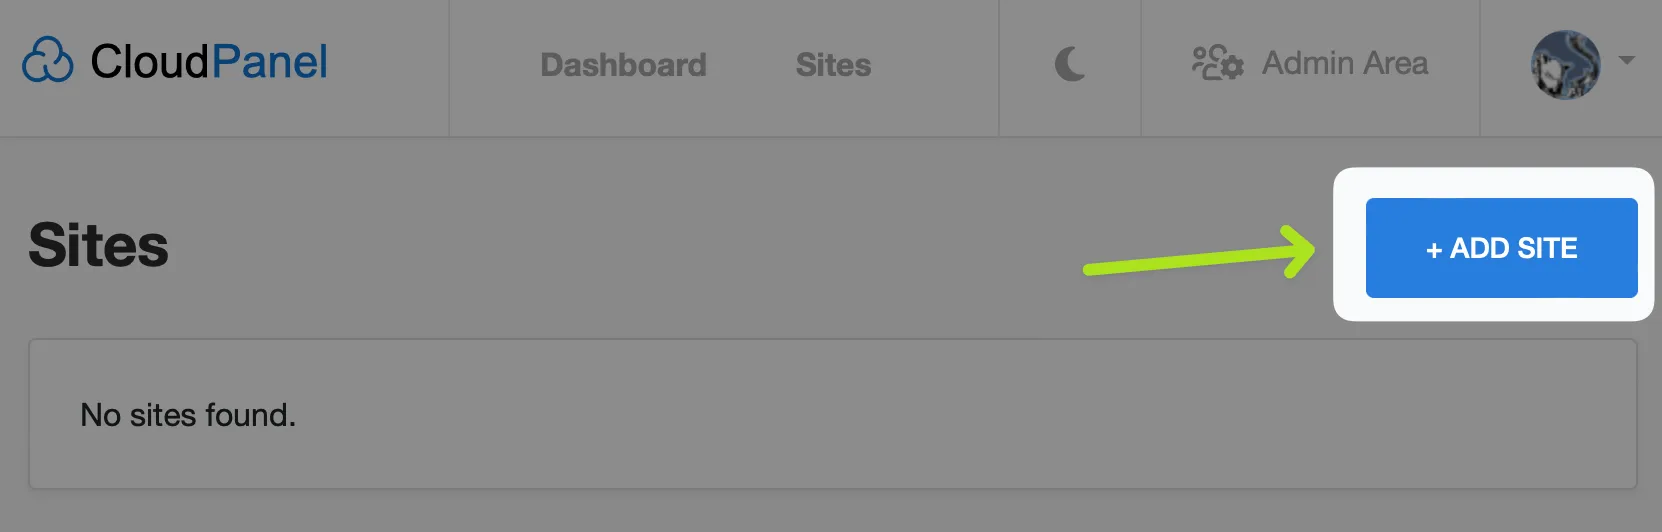
Setup your first site
Follow the steps below to add your first site.
ℹ️ We don’t recommend you host many different sites/domains on the same server. Although CloudPanel supports it easily, you are better off spreading your risk across multiple servers. Noipfraud does not have a domain or server limit anyway.
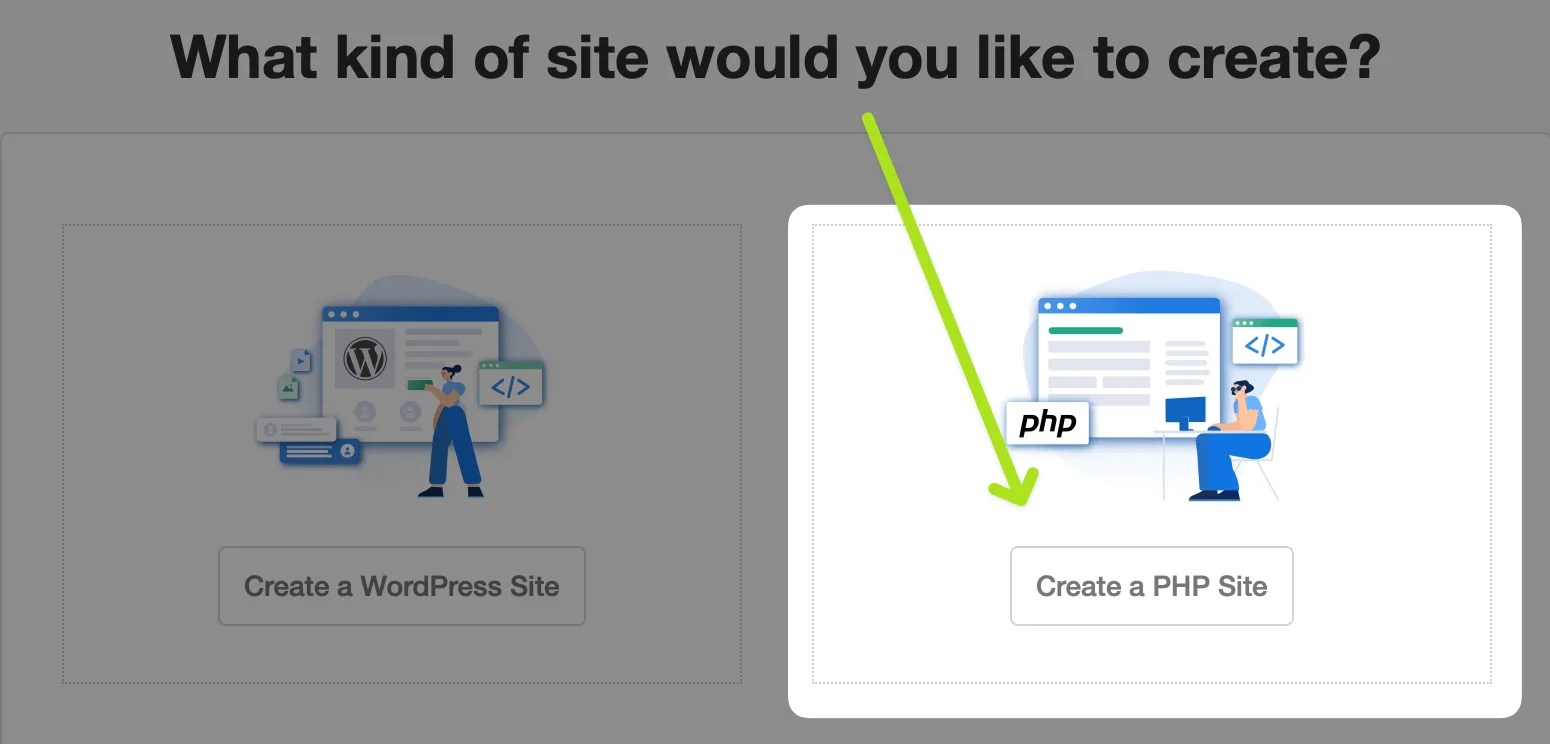
- Make sure the application type is
Generic - Enter the domain name you will use for this site. Each site on your CloudPanel server has its own domain / subdomain. Use of subdomain is optional. We are just using
test.noipfraud.comas an example. The next section will show how to setup DNS and SSL. - Select PHP Version 7.4 - we will soon support 8, but right now use 7.4 to avoid potential issues.
- Optionally change the Site user & site password. These are for SSH access to the site folder.
- Make sure you save the Site User and Password somewhere safe.
Setup & test your domain
This section covers the following steps:
- Setup DNS
- Setup SSL
- Test your server
Setup DNS
First you need to setup the DNS for your domain to point an A record to your server IP. You can copy your server IP address in your browser by clicking it.

Next open the DNS management panel of your preferred domain management solution.
In the example below I am using Cloudflare in DNS only mode. This is so its more consistent with other domain management solutions.
If you use Cloudflare (recommended) then you are better off enabling the Proxy mode (orange cloud) as it will simplify SSL.
For other domain registrars, please see the FAQ section below with links to their guides.
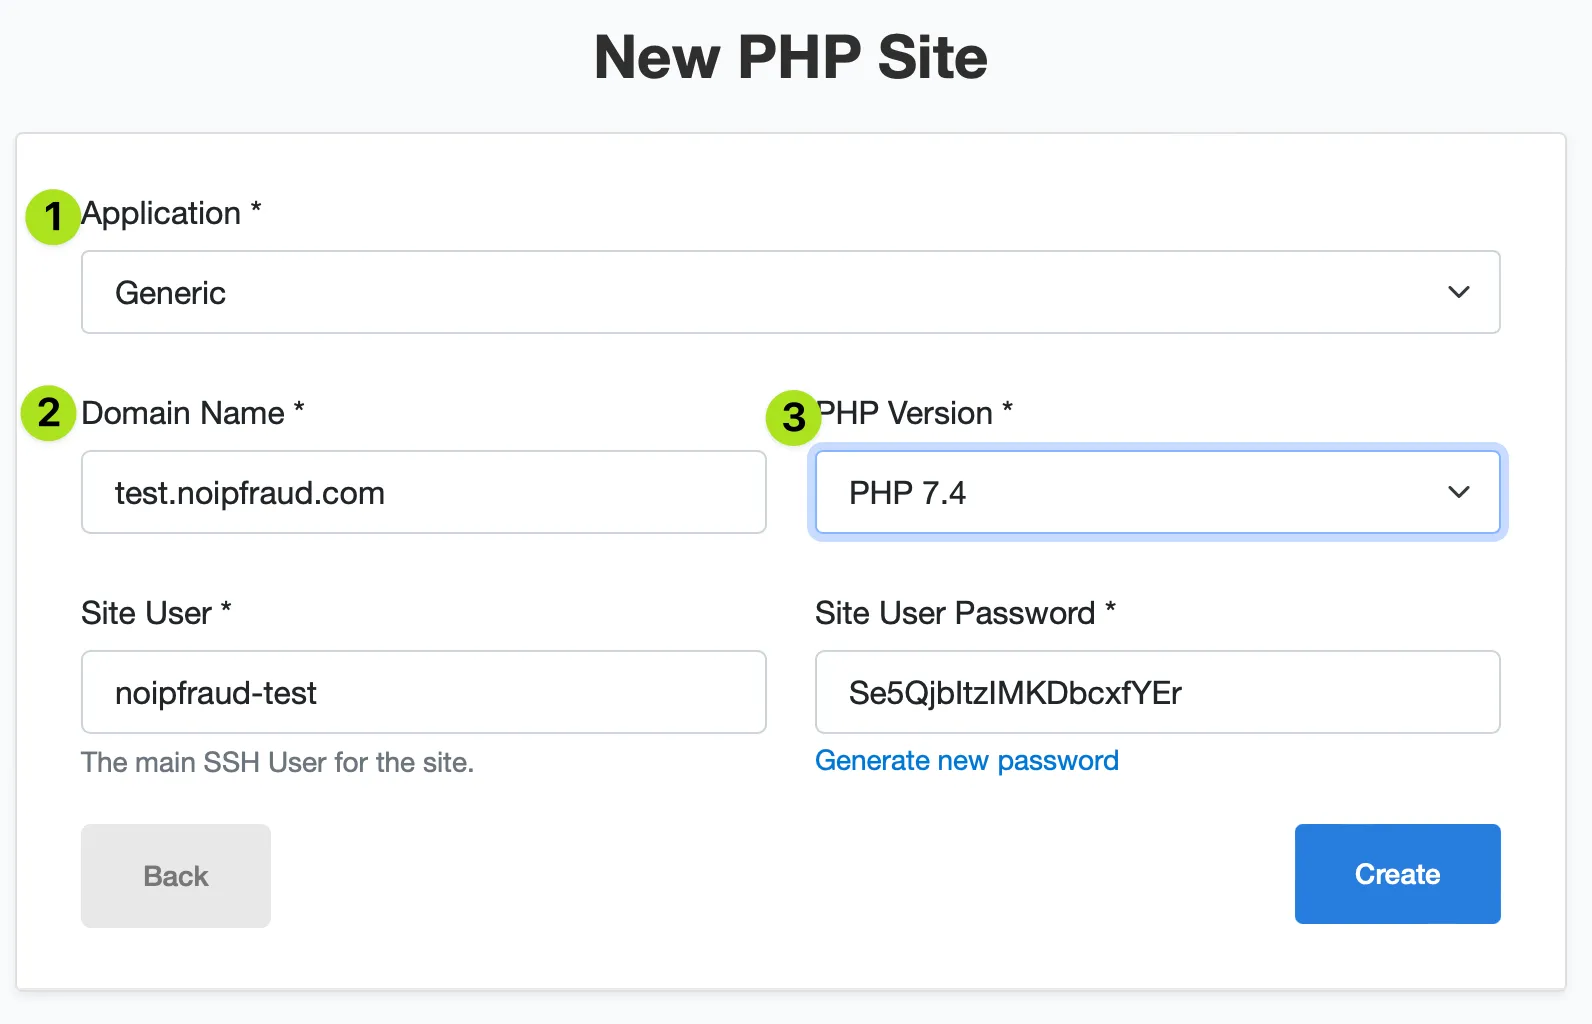
You now need to create your A record.
- Click the
Add recordbutton - Make sure the type is set to
Aif your server is showing a IPv4 address like ours (eg 4 numbers separated by dots). If your server has IPv6 address - select theAAAAtype. You can add both if your server has a IPv4 and an IPv6 address. - Enter the subdomain,
wwwor if you set your site for the root domain use@. In our case the site is setup fortest.noipfraud.comso we entertesthere. - Enter the IP address for your server that you copied earlier
- In this example on Cloudflare, I am disabling the Orange cloud so the A record is set to DNS only mode. This is so its similar to other DNS editors. On cloudflare you want to enable Proxy status.
- Click save
You should now see the record you setup:

If you are using Cloudflare for SSL then it will look like this:

Next we need to setup SSL.
Setup SSL
Use this section to setup SSL - this is only needed if:
- You use Cloudflare in DNS only mode (gray cloud - shown further down in this example)
- You use another DNS provider.
Cloudflare Proxy Mode
You do not need to setup your SSL on your server if you use the orange cloud / proxy mode in Cloudflare.

Important: But you do need to make sure you set Cloudflare SSL mode to FULL.
Other DNS providers (incl Cloudflare DNS Only mode)
In this case you want your server to be setup with a free LetsEncrypt SSL certificate for your domain.
You can do this easily in CloudPanel.
📄 CloudPanel Guide: https://www.cloudpanel.io/docs/v2/frontend-area/tls/
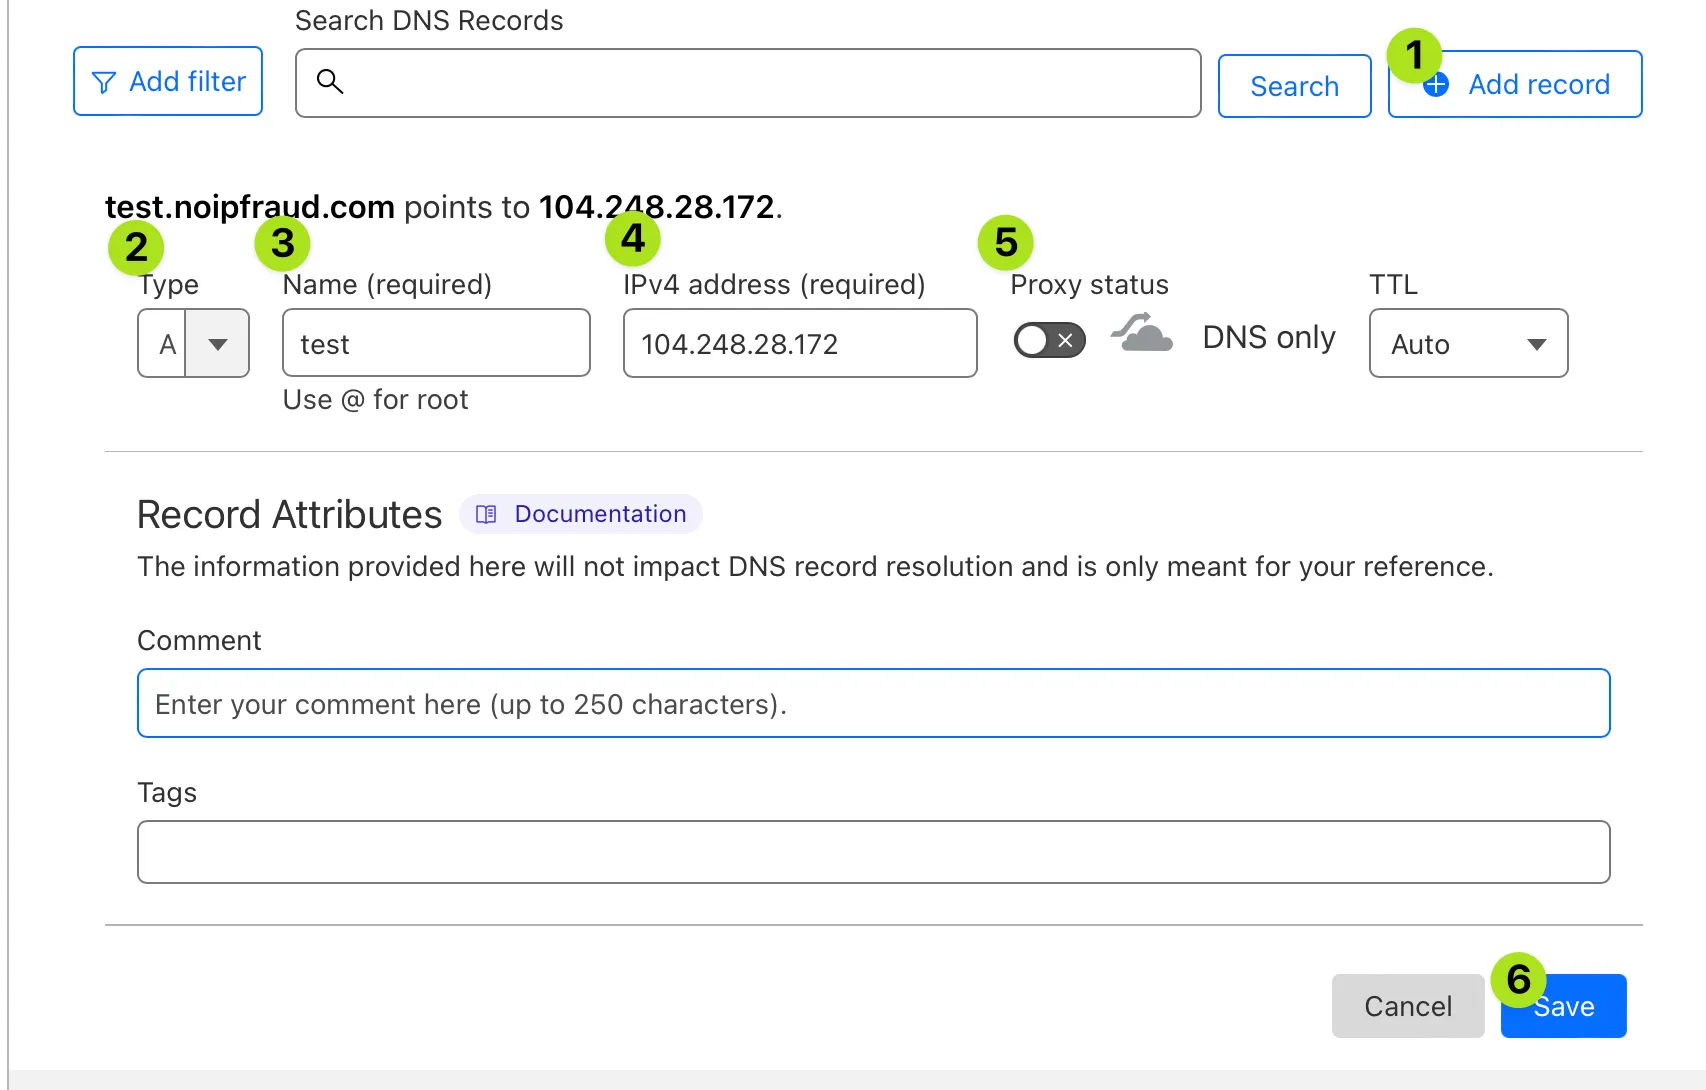
Go back to the Site management screen you were on when you uploaded Noipfraud.
- Select the
SSL/TLStab - Click the
Actionsbutton - Select
New Let's Encrypt Certificate
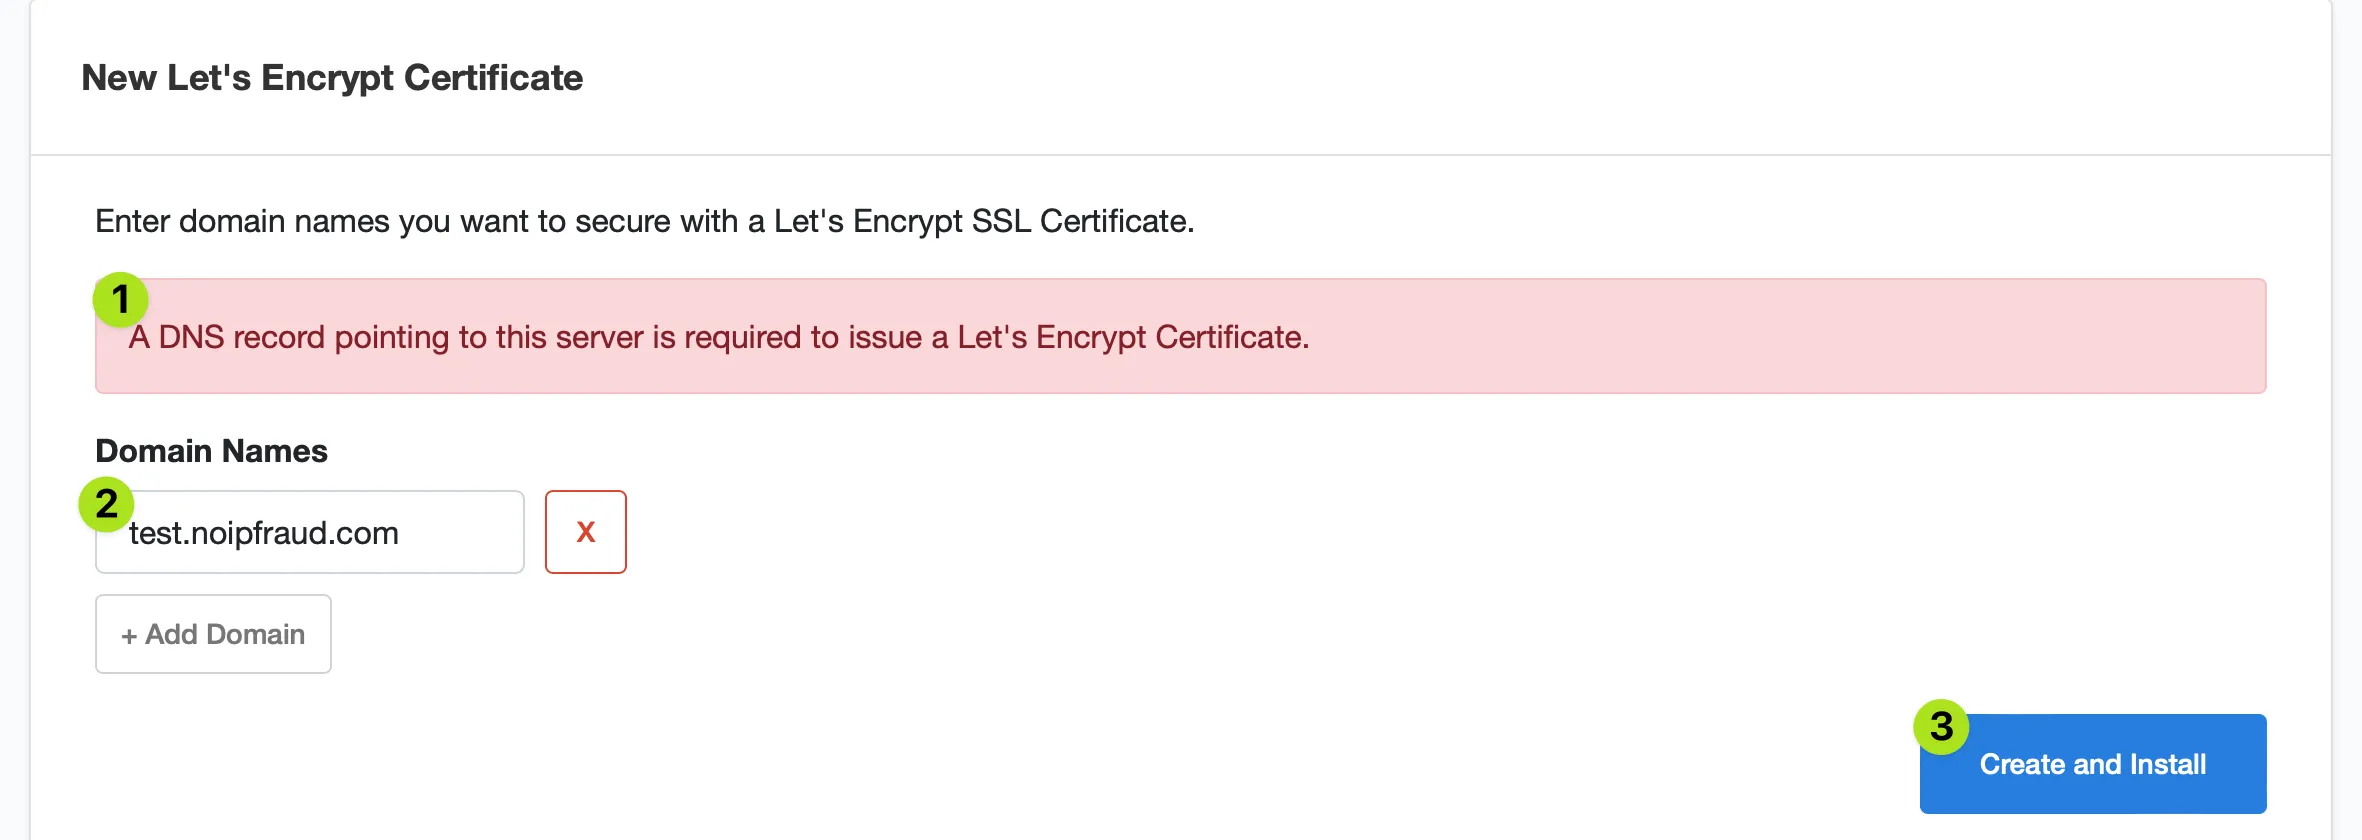
- We already setup the DNS record in the previous section
- The domain name should show the domain name you used to created your Site and for which you setup the DNS record.
- Click
Create and install - Wait for a bit - it can take 15-30s or so, but sometimes a bit longer.
If all went well you should see this confirmation

And the LetsEncrypt certificate for your domain should be listed in the table below it. Note: LetsEncrypt certificates last 3 months and are automatically renewed by CloudPanel.

Now your ready to test your domain.
Test your Domain
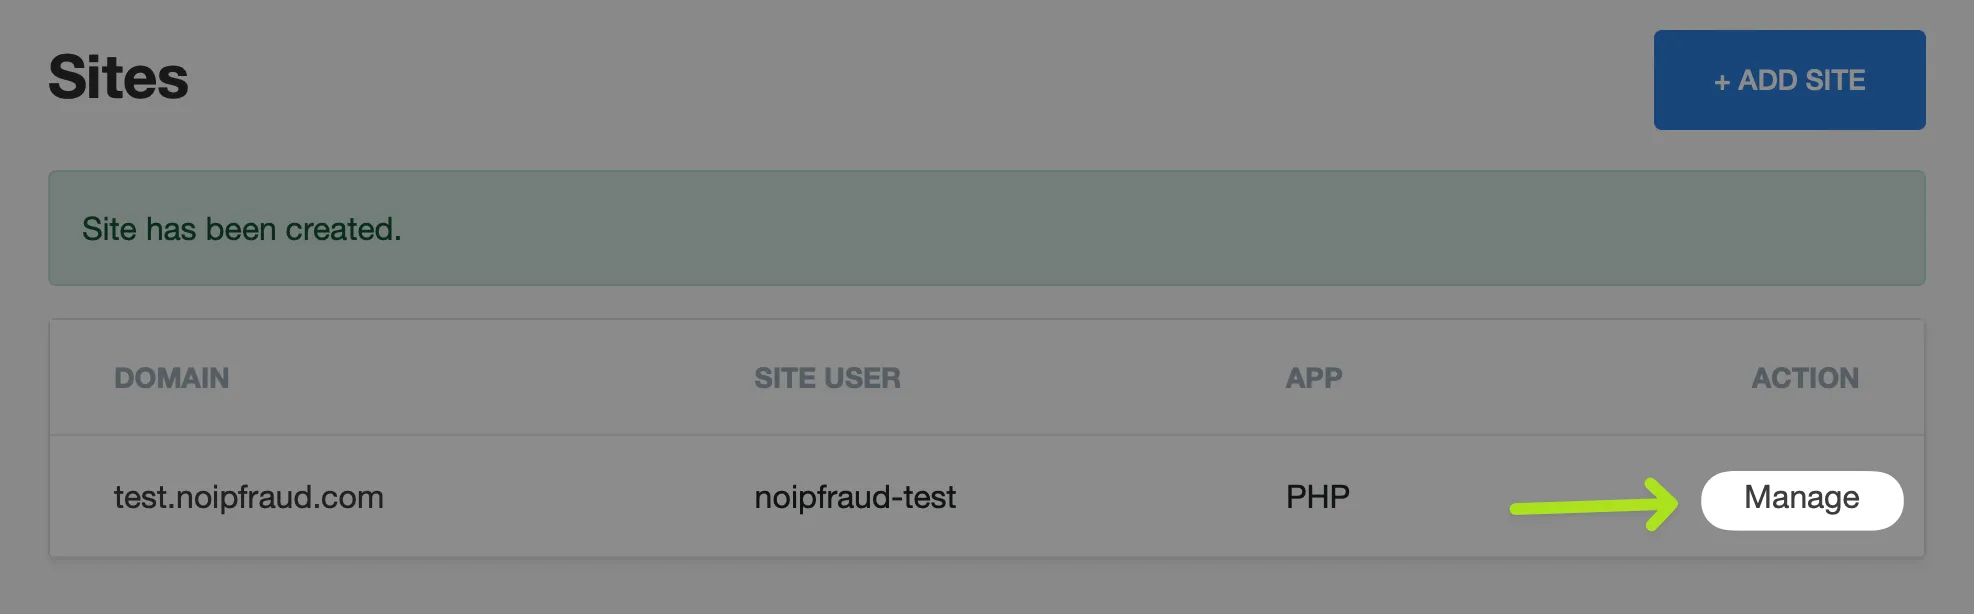
Click the Manage button for your domain to access the file manager.

Next we need to go to the web folder (file > htdocs > domain) for your site.
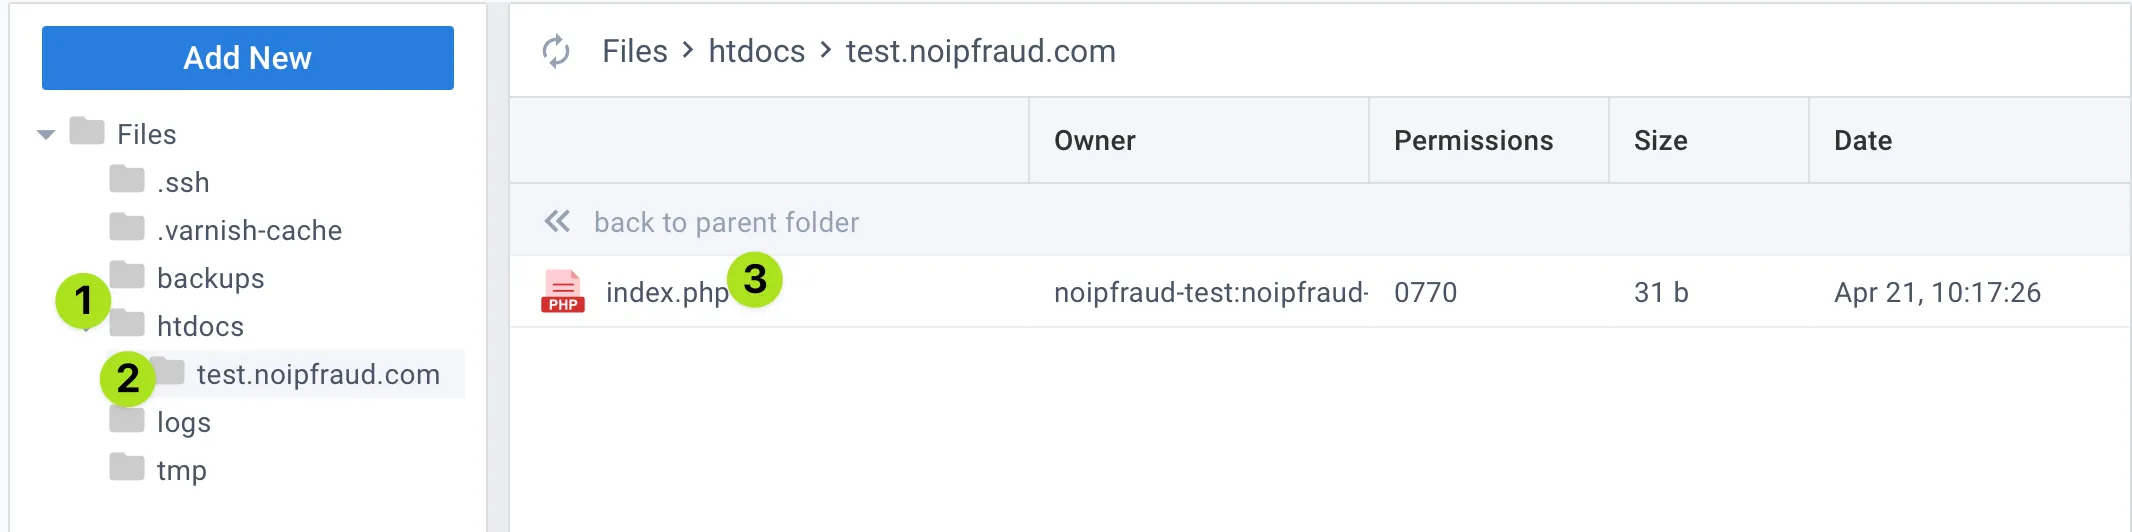
- Select
htdocsin the sidebar, and expand it - Select your site, in our case its
test.noipfraud.com- yours will be different! - Next, Right click o
index.phpand select theEdit fileoption.
Replace the code with this:
<?php
phpinfo();
?>
Then press save and close the edit window by clicking the x on the right.
Now open your domain in your browser, in our case this is: https://test.noipfraud.com but yours will be different of course.
You should see something like this:

If you do not see this - then please contact us on telegram.
Install Noipfraud Software
To install Noipfraud, first download a fresh Noipfraud zip file to your laptop as you will need it in a moment to install:
💾 Download here: https://noipfraud.com/download/latest
Next - You need to upload and extract the noipfraud software.
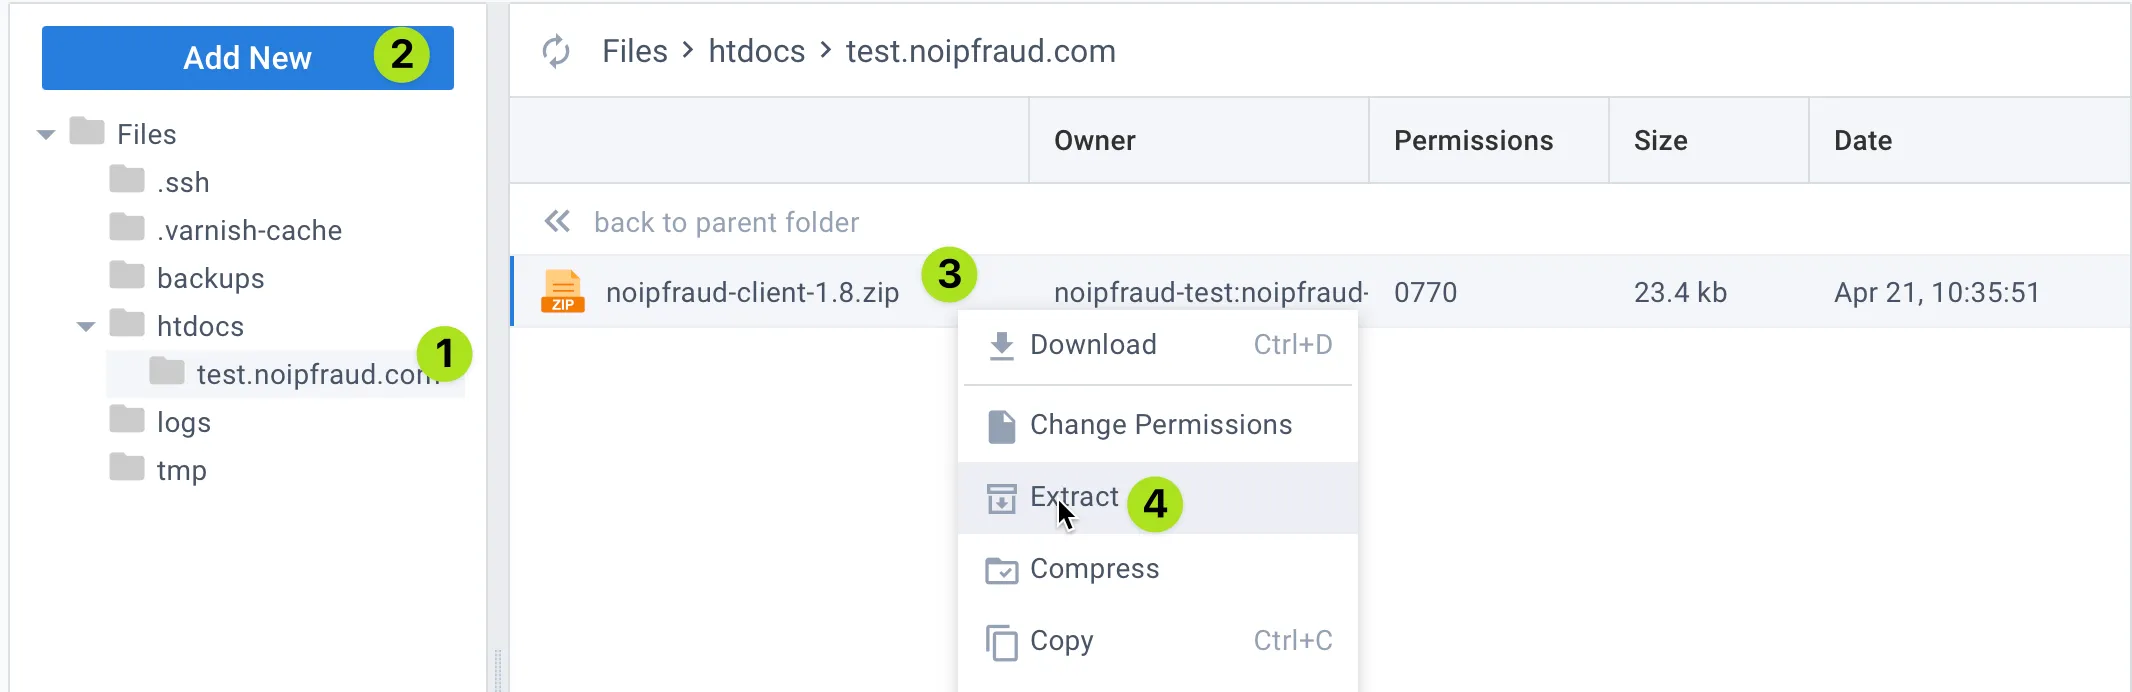
- Make sure you select the folder you created in the previous step, eg in our example its
example - Click
Add newbutton in the side bar, and this time selectUpload fileand select thenoipfraud-client-1.8.zipfile you downloaded at the start of this section. You can get it here. - Right click the uploaded file
- Select
Extractfrom the popup menu and enter an appropriate folder name - make sure you read the important message below!
⚠️ Important: Naming your folder is important. Make it generic and not related to noipfraud. So DO NOT use sus names like noip,noif,cloak. Also dont use
examplelike I am doing.
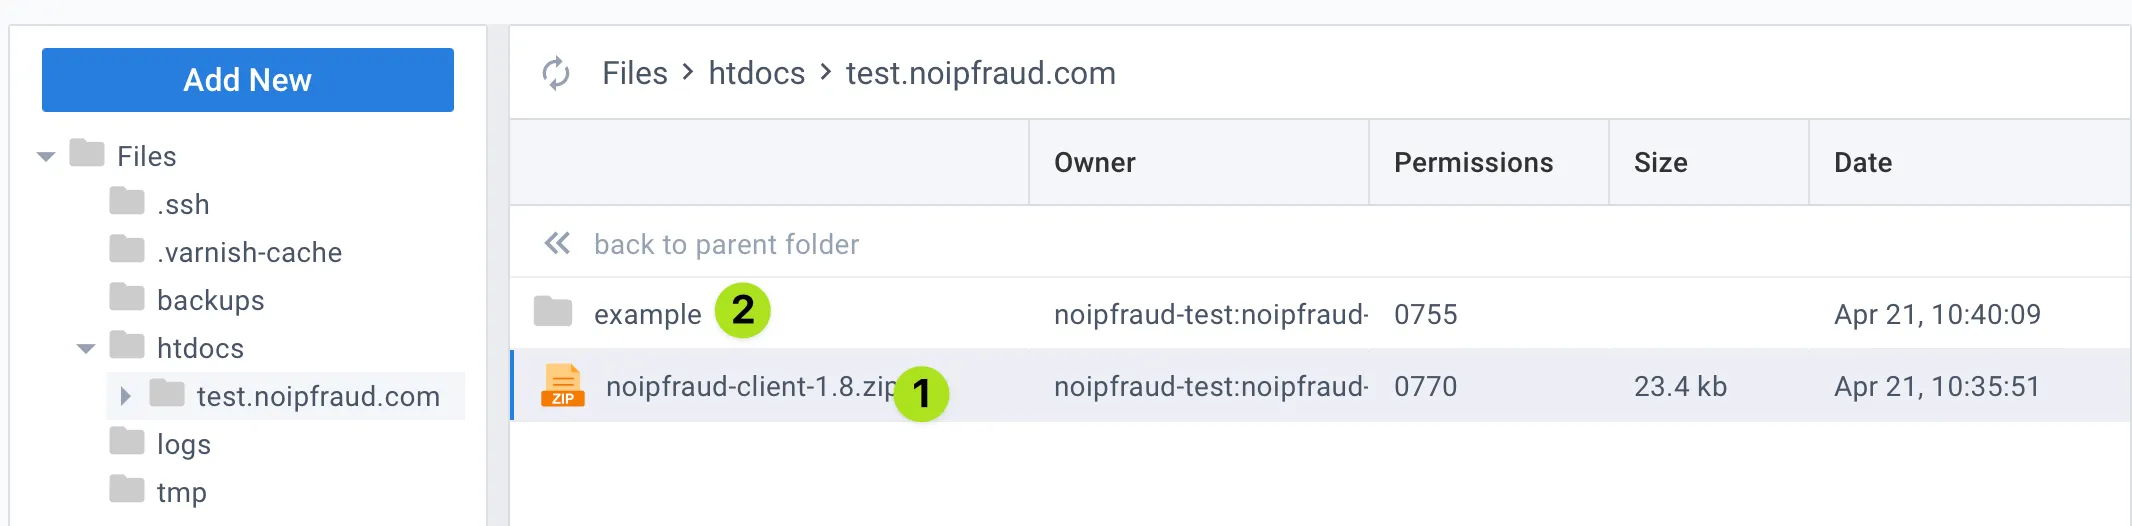
- Right click the zip file again, and this time delete it
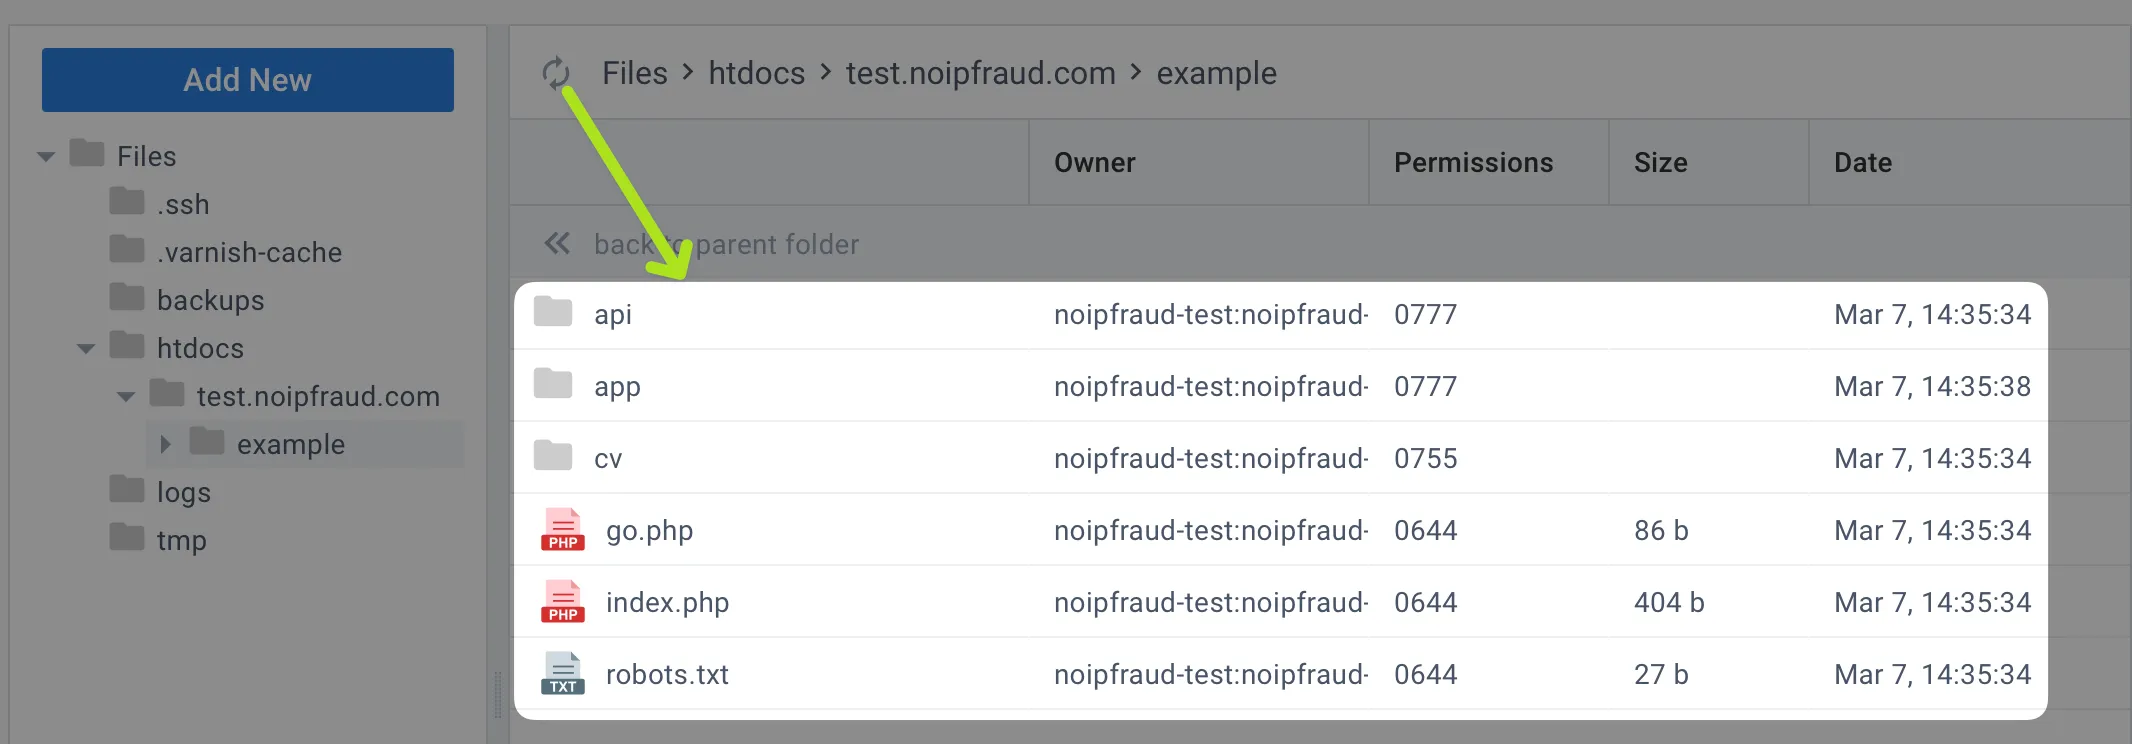
- Double click on the folder you entered, yours will be named as per your choice at the previous step.
It should look like this - of course file Owners and Dates will be different.
You are now ready to open your Noipfraud client in your browser. The URL to your noipfraud client will consist of:
- the domain you assigned to your site
- the folder you installed noipfraud in
- the
/appsub folder
So it will be like this: https://{domain}/{folder}/app.
In the case of our example it will be: https://test.noipfraud.com/example/app. Yours will be different but should always end in /app.
If all goes well you should briefly see this screen when the noipfraud software makes sure the server is compatible:
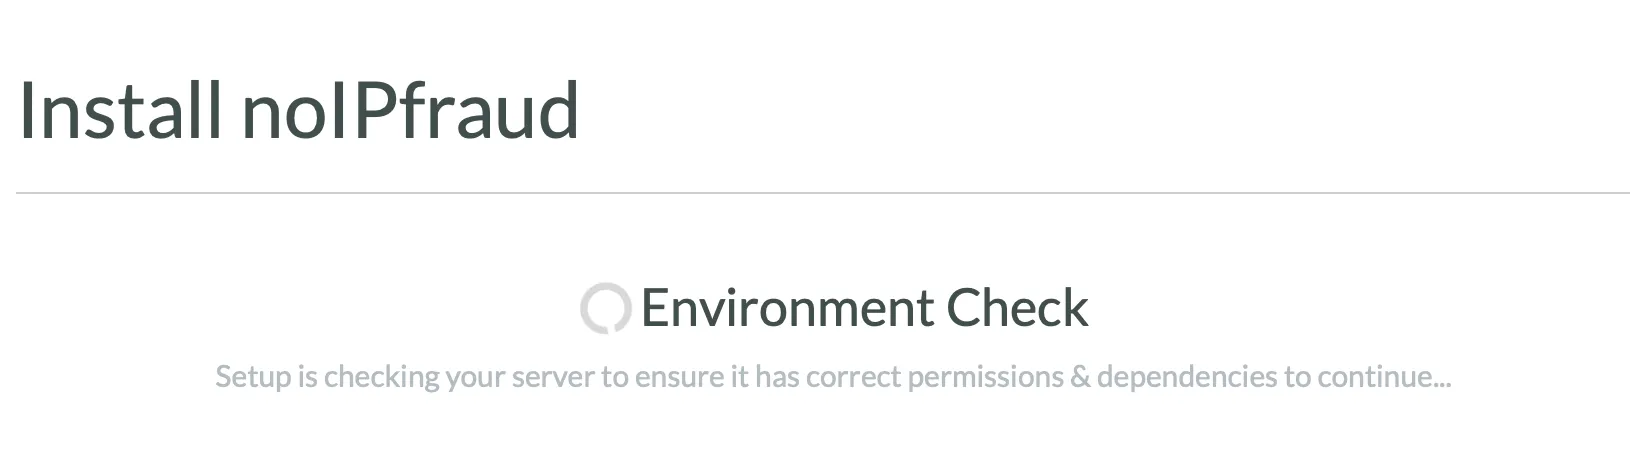
Its shortly followed by the config screen where you can enter your API details and set the login for this specific noipfraud client.
ℹ️ Every noipfraud client you install from scratch has its own login.
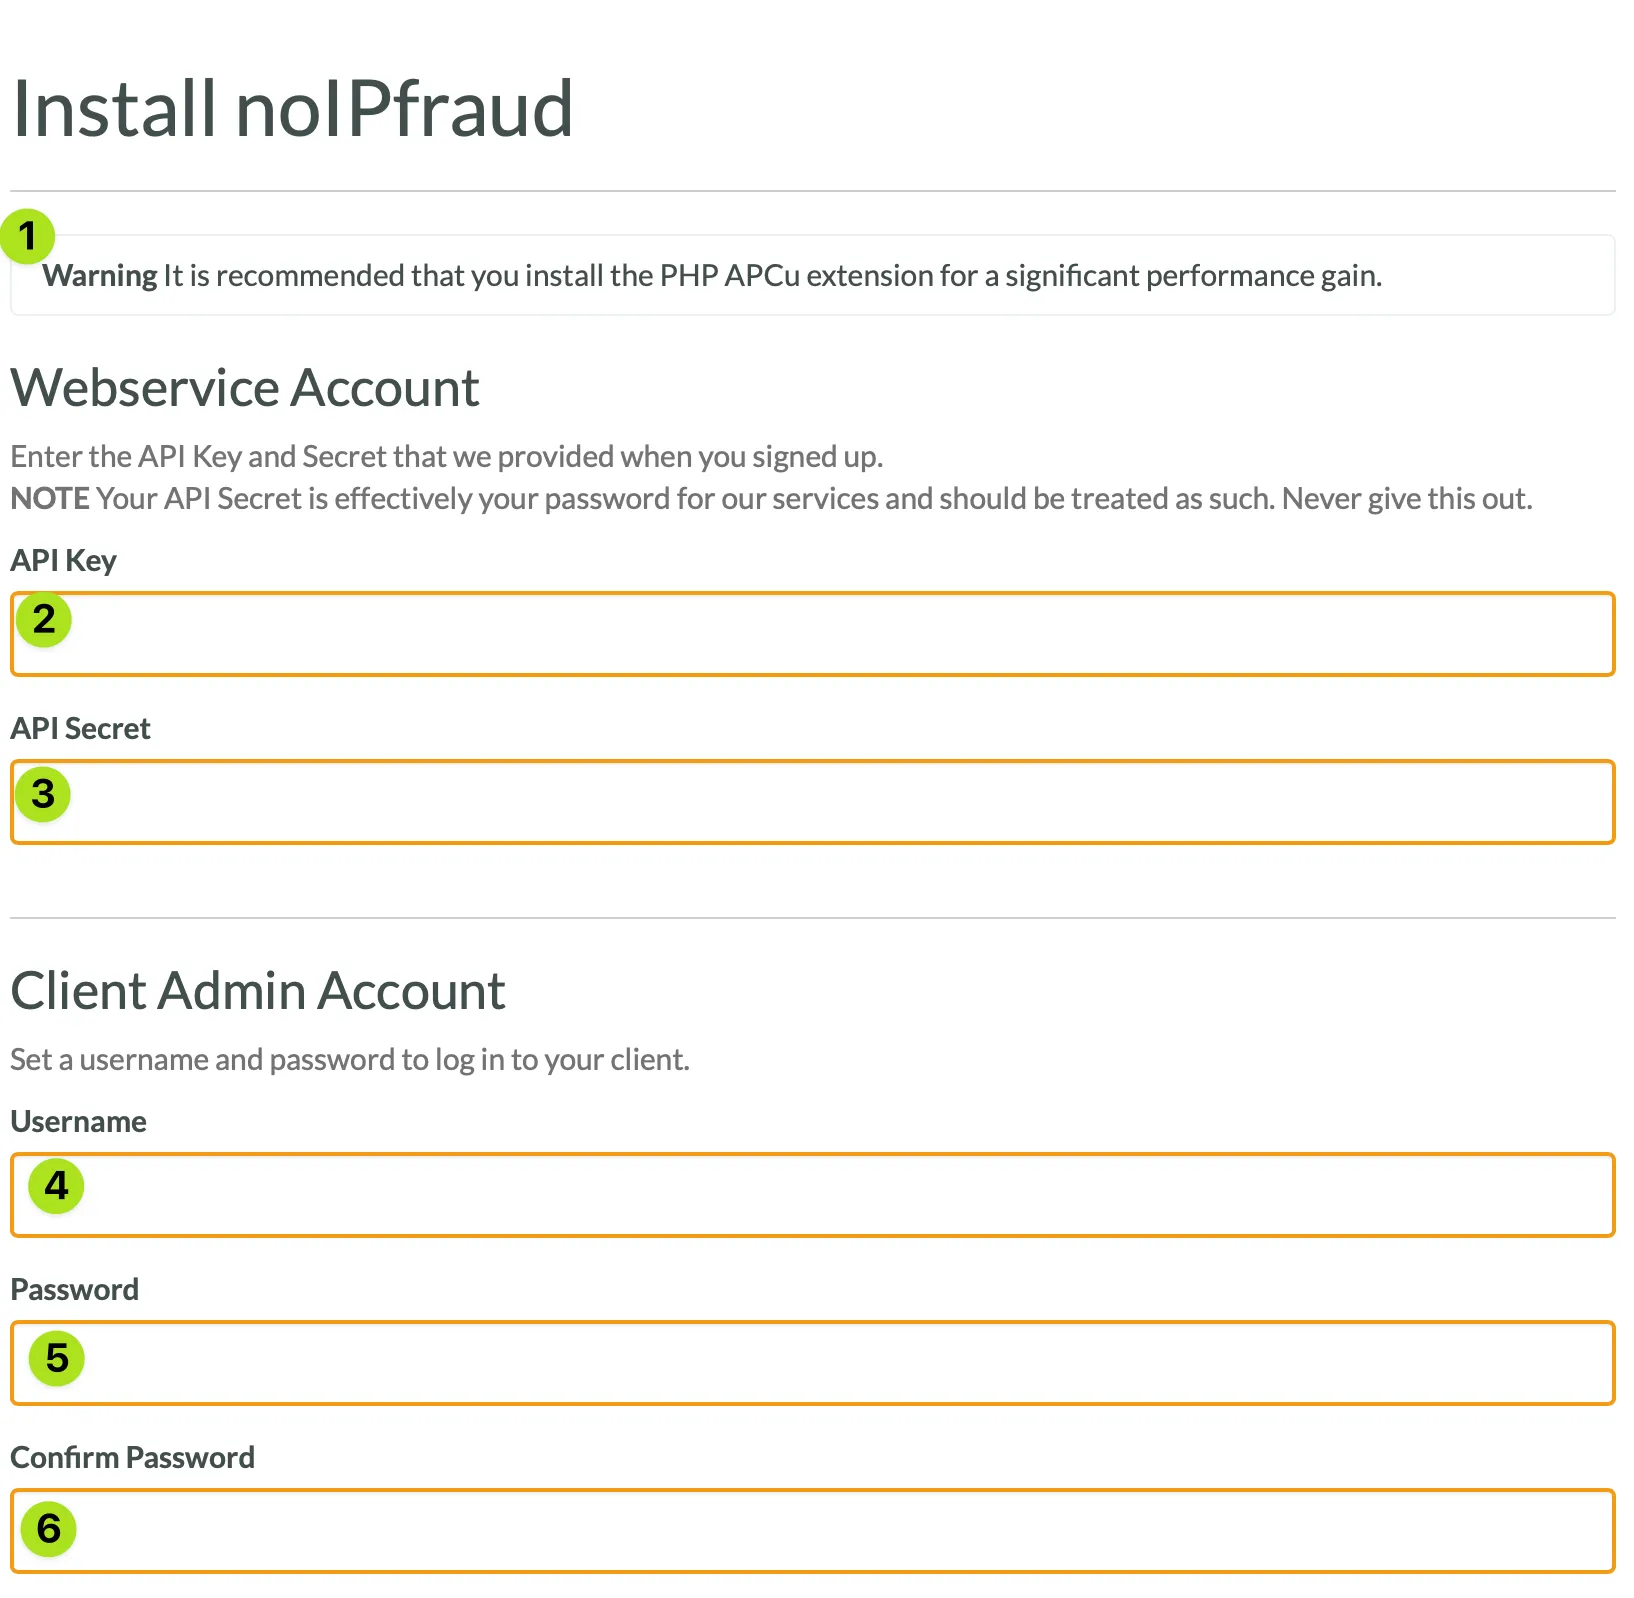
- Dont worry about this - as you are running php7.4 this extension is not needed.
- Enter the API key from your welcome email
- Enter the API secret from your welcome email
- Set a username
- Set a password
- Confirm the password
- Click the big green button
If all goes well you should see this screen briefly, followed by the login screen.
Your Noipfraud Client
Here is the screen after you login for the first time:

Some useful things to check:
- The
campaignstab is where you create and manage your campaigns - The
supportlink in the menu logs you into our support site where you can read our getting started guides, and manage your account. - If you need our help you can chat to us by clicking the icon in the bottom right.
- You create campaigns by clicking this button. Dont do that now though, check the guides in the support section (2) first
- This is where you can see your click balance and account email
Do you need help?
🆘 If at any point you need help you can 💬 chat with us on telegram or 📧 email us at support@noipfraud.com
FAQs
Here are some FAQs related to setting up your server:
What are your server requirements?
Noipfraud uses PHP and is compatible with version 5 to 7. It also requires some php extensions: php-curl, php-openssl, php-mbstring, php-sqlite3. Use a linux server - AMD64.
For webserver we recommend nginx. For small amounts of traffic (<100k visits a day) - a 1GB 1CPU server should be sufficient. For 100-500k visits a day - go for 4GB / 2CPU. Above 500k scale as needed from 8GB / 4CPU.
Can you show me DNS guide for other registrars?
Sure can - just follow the links below for your preferred registrar:
How to use Cloudflare in Proxy Mode?
Its straight forward. Im assuming you have setup your domain in cloudflare. Just login to dash.cloudflare.com and go to your websites DNS settings. If you already the A record in DNS only mode, all you need to do is enable the Proxy mode. Or you can create your A record with Proxy mode enabled. You also need to set SSL mode to Full in cloudflare. See this guide for more info. Also make sure SSL mode is set to Full. See the SSL section earlier for more details.
How do I use multiple domains with the same site?
You are better off running multiple servers if you can - noifraud does not limit domains or servers. If not - then just create another site on your cloudpanel server for your other domain. If you really need to point 2 domains at the same site, then this is possible but please contact us on telegram to discuss this.
How many sites can I host on 1 server?
Its really just limited by the size of your server and the amount of traffic your getting. However - we dont recommend hosting many different noipfraud sites on a single server as this creates a single point of failure and possible footprint. Better to spread your risk across multiple servers.
How do I change the domain for an existing site I setup?
The recommended way is to create a new site, and then copy the files from the old site. You can do this via SSH, or in the file manager by compressing your web folder, downloading it and then uploading it again to your newly setup site. You may need to edit file owner/group permissions.
Can I run other software on this Server?
Yes. CloudPanel comes with a ton of easy to install applications for PHP, NodeJs and Python. Just add a site, and look through the available options.
How do I integrate Noipfraud with Wordpress?
Create a new PHP Site but select the Wordpress application option, then install noipfraud indside that site following the guide above. But we have not tried this. Contact us on telegram to let us know your interested in this.
What is your recommended campaign setup?
Every campaign is different so there isnt really a best setup. But I guess you know this. We do always suggest to use non-redirect style campaigns if you can, and the embed non redirect is probably the best option. You can find the guide for this in your noip client support section.
And here are some other relevant questions:
How do i signup?
Go to noipfraud.com and click Buy now. Everyone starts on the weekly starter plan. You can upgrade to higher plans ones you have renewed 4 times.
What is N2?
N2 is our newer platform that does not use PHP and doesnt need a webserver. It comes with a build in central dashboard, a more advanced tracker and content proxying. You can find out more at https://n2.app
Noipfraud is not for me. How do I cancel?
Contact us on telegram or email support@noipfraud.com.
Can i get a refund?
Yes we can refund any payment within 7 days from when it was made as long as you have not used more then 50% of the allocated credits. Contact us on telegram or email support@noipfraud.com.
Ive run out of clicks, how do I get more?
Easy. Just click Support in your noip client, select the desired plan and tick the Renew immediately option on the confirmation screen. We will send you an email to confirm your request and then will take payent for the renewal.
How do I change my payment method?
Click on support in your noipfraud client, then click Manage my Subscription followed by Update my payment